Bodyboarding - How To Ride A Bodyboard
How To Boogie Board in General
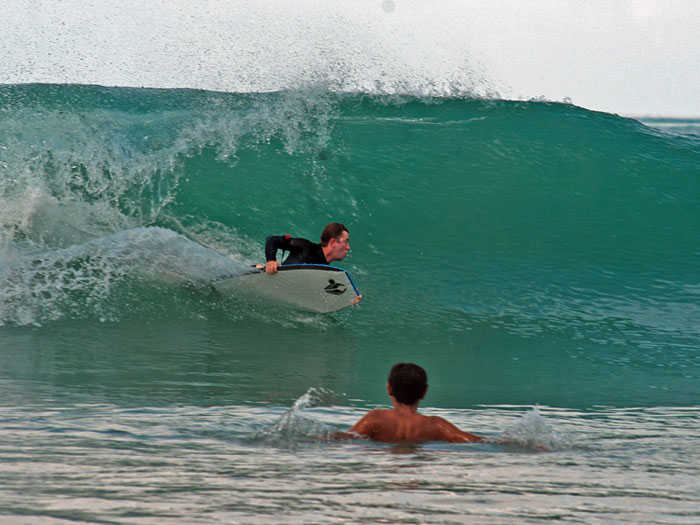
Bodyboarding like skating/surfing it is all about maneuvers, it can be a 360, a 360 Reverse or whatever, but one of the most fun things about bodyboarding is getting air....launching airs (with a combination if possible) is where bodyboarding has been successfully headed in recent years....mastering those maneuvers requires time and practice. Also trying a 360 air reverse on a beach break is for sure less harmful than on a reef break.
How to Choose a Bodyboard
Bodyboarding is really easy to start, a bodyboard suited to your weight and height (see chart under), a good pair of fins (flippers) and a leash will have you on the way to catching your first wave, pulling a 360 even on the flat section is another story....

NMD Njoy model is an ideal first bodyboard
| Bodyboard | Your weight | your Height |
|---|---|---|
| 36"-38" | 65 - 85 lbs | 4' - 5' |
| 39" | 85 - 115 lbs | 4'6" - 5'2" |
| 40" | 110 - 130 lbs | 5'3"- 5'6" |
| 41"- 41.75" | 125 - 170 lbs | 5'7" - 5'9" |
| 42" | 145 - 180 lbs | 5'9"-6'0" |
| 42.5" | 160 - 190 lbs | 5'10"- 6'2" |
| 43" | 170 - 210 lbs | 6'1"- 6'3" |
| 44" | 180 - 270 lbs | 6'2"- 6'4" |
| 45" | 195 - 255lbs | 6'3" - 6'6" |
| 46" | 200lbs + | 6'4" + |
Length- Your board, when standing on it's tail should come up to roughly within 1 inch either side of your belly button.
Width- You should be able to hold the bodyboard under your arm without much slack between your armpit and the rail.
Nose and tail width, and template- if you're a beginner, the tail design doesn't really matter much, but if you're more into the sport, bat tails are the choice of most prone-only riders, and crescents are the choice of most drop knee-only riders. If you are both, then consider what your ratio of prone to drop knee is, and go with the tail design that covers how you ride more (prone or drop knee). On templates, most prone riders like a bodyboard with the wide point closer to the nose, and most drop knee riders like it further back.
Rails- Most bodyboards have a 60/40 rail configuration which means that 60% of the rail is on the bottom side and 40% is on top, this is better for prone riding and makes tricks easier to pull off. Some bodyboards have a 50/50 rail which sticks better to the curl , it is also more stable (good for Drop Knee riding) but less forgiving for the 360 and reverse tricks.
Check out the complete range of NMD Bodyboardsand buy a bodyboard online.

Bodyboard Construction and Parts
Understanding the different construction types and parts of a bodyboard will help you to decide on which bodyboard is right for you. Make buying your body board easy by understanding bodyboard construction terminology.
Read More About Cores, Foam Types and Bottom Skins, Bodyboard Construction and Parts
How to Insert a Leash Plug
You can use anything that is strong and at least 4 inches (10cms) long, a screwdriver is best, heat it for a minute or two then start to perforate the board with the heated screwdriver, from the bottom through to the deck.
Alternatively, you can use an electric drill on slow speed, with a 3/8 drill bit. Remember to always drill from the bottom.
It is not necessary to use glue, just be sure to firmly tighten the plug.
Most riders will put the leash about 8 inches (20cms) down from the nose of the board in the center, but some will put it about 6 inches (15cms) in from either side depending on whether they are regular or goofy foot.
Note: If your bodyboard has a stringer, do not install the leash in the center or you will hit the stringer, just install it about 3 inches (4.5 cms) either side. With double stringer bodyboards, the stringers are usually placed halfway between the center and the rail, so most put the plug in the centre, or a little to the left or right.
See also how to care for your bodyboard and stringer placement

Wax - Is It Necessary to Wax a Bodyboard?
Surfers wax their boards to improve their grip, it is the same for bodyboarders.
Do not wax the entire deck of your bodyboard as you need to be able to move your body depending on the manouvres you want to execute, for a 360 your body has to be in the middle of the bodyboard whereas while prone riding your hips have to be in contact with the tail of your board.Wax the nose of your bodyboard (last 1/3 from the top) including the rails, then same thing for the tail and finally the rails in the middle of the board. Drop Knee Riders will wax exactly the same way except that they will just wax half depending whether they are regular or goofy.

Wax for drop knee riding

Wax for prone riding
 Bodyboard Wax
How to Remove Wax
Pour hot water on your bodyboard and the wax should melt off. Another option is to use a hair dryer wiping the wax off with a wax comb while it's still melted and hot.
Wrist or Bicep Leash?
WRIST
Positive- It's comfortable and easier to tie/untie.
Negative- During some tricks, like an ARS, the leash may get rolled around your arm
BICEP
Positive- The main concept is to keep the leash out of the way when paddling, as it is attached just above the elbow on your upper arm
Negative- It may hurt while flexing those huge bicep muscles you have.
80% of top bodyboarders today are using the bicep leash
What About Swimfins ?
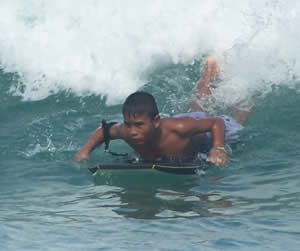
Bodyboarding without swim-fins is almost impossible! Fins will help in all aspects of bodyboarding; paddling out, catching waves, steering and controlling the bodyboard as they are acting as skegs. After the board itself, swimfins are the most important accessories in bodyboarding.

Advice for all who rent bodyboards on Phuket beaches, include fins in the rental and your customers will definitely come back the next day for a new session. There's nothing more frustrating than renting a bodyboard and not being able to catch a wave!
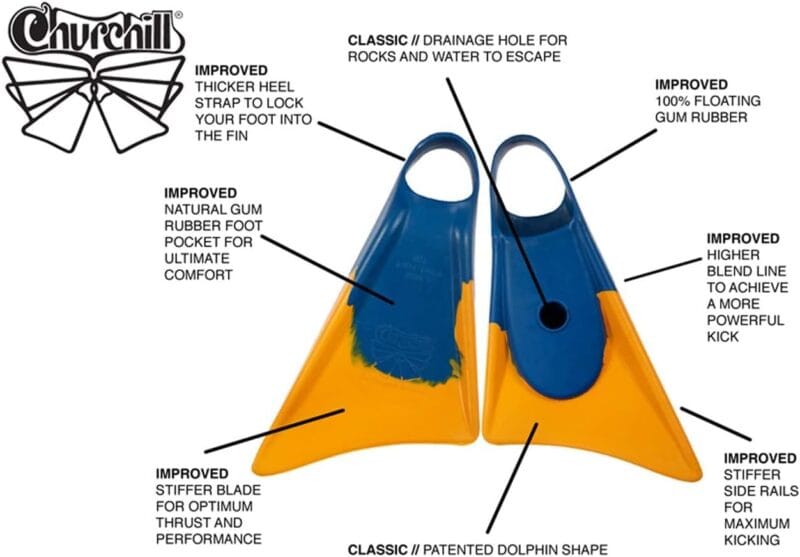
Churchill Fins
The most popular fins for bodyboarding on the market are Churchill fins. Invented in 1936, Churchill MAKAPUU FINS utilize a patented dolphin fin design which gives you optimum power and acceleration for catching waves.
Makapuu fins also act like skegs on a surfboard to help maintain total control. The blue rubber covering your foot is soft for complete comfort while the rubber found on the blade is stiff for more kick power.
Another popular fin brand is ALLY Swimfins
Designed with the feedback from the most dominant bodyboarding team riders out there, Ally fins combine the highest quality Malaysian rubber with a soft foot pocket and stiff straight-edged blade. The unique bat tail blade is designed for maximum thrust and acceleration. Other details include a floatable construction, and traction bottom with breather hole at the bottom of the foot pocket for proper drainage, which allows sand and broken shells to circulate out.
Fins/Skegs on a Bodyboard
Using skegs on the bottom of your board will help you to not slide out (which is useful when you start drop knee riding), other than that it is a useless accessory as it goes in total contradiction with the essence of bodyboarding (spinning). Bodyboarders have not used them since the beginning of 80's.
Body Board Care Tips
Bodyboard Care
Do not leave your board in direct sunlight. It will rocker out (loose it's concave shape) and bubble your board! The same thing will happen if you leave it in the car on a warm day.Rinse your board with freshwater as soon as possible after each session!
Salt and Sun are the worst enemies of your bodyboard. Always keep your boogie board in a bag to protect it from the elements and accidental damage when moving it from surf to home.
How to care for your bodyboard - Bodyboard Care Tips from NMD
How to Catch Waves on a Bodyboard
Paddling out
- Wax your bodyboard
- Lay down on the board so that your hips are in contact with the tail of the board.
- Place your hands on the top corners of the bodyboard.
- Keep your elbows on the board. It is almost impossible to control your bodyboard if your elbows are dragging in the water.
- Arch your back and keep your head up.
- Make sure to keep your fins underwater, beginners have a bad habit of slapping the surface with their fins which is absolutely inefficient
Catching Your First Wave!
- Try to pick a wave that's not too big and that has a clean face. You need to try to catch it just before it breaks and turns to whitewater.
- As the wave approaches, start to kick with your fins underwater. Once you've chosen to go right or left, it's time to get in the right position.
- If you have chosen to go on the right, move your body to the inside (right) edge of the board and apply pressure with your right hip to the back edge. Put your right hand to the top right corner with your right elbow pressing along the right edge of the board acting as both a pivot and the main point of control.
- Your left hand should be around 1/3 down the outside (left) edge of your board with your left arm slightly bent and the elbow in air. Your right hand and elbow are controlling your rail and keeping it in the wave and your left hand and arm are controlling your direction. If you go left on the wave, just reverse all the body, hand and arm positions.
- To gain speed, crucial for any maneuver, simply slide forward on the board, but not too far or you'll lose your hip pressure on that inside edge and start sliding out and losing control. In the meantime, lift your outside foot to reduce drag, so on a right hand wave, lift your left foot and a left hand wave, lift your right foot.
Check Out This Video on How to Ride a Bodyboard
Once you are really surfing you might want to try some turns, tricks and maneuvers
Check here for other learn to surf tips
Check this page from time to time for further updates
Nice work, after travelling to Nai Harn for years (pre covid) i was pleasantly surprised to come across a community of fellow boogers. After continually hearing stories of fellow boogers residing in the north around Kalim, it would be great to run into some fellow boogers on return next year.
Great work! Some very useful tips